Don’t start with a full-intensity session. Most new owners pull the flirt pole out of the box, run it for 10 minutes, and end up with a sore overaroused dog who hesitates to engage on day two. The fix is a 5-session ramp protocol spread over 1 to 2 weeks. Each session adds duration and intensity. By session 5, the dog is conditioned and ready for the standard daily protocol.
The full ramp totals about 28 minutes of actual play across 5 sessions, with 1 to 2 rest days between. The goal is positive association, not exhaustion. End every introduction session while the dog still wants more. For the underlying technique the ramp builds toward, see the complete flirt pole training guide. And if you’re still on the fence about whether this work delivers real behavioral results, do flirt poles really work covers the data across 400 client dogs.
Sessions from first sniff to full standard protocol-refined across roughly 400 client dogs over 10 years. About 28 minutes of total play, spread across 1 to 2 weeks.
Who This Is For
- Anyone who just got a flirt pole and isn’t sure how to start
- Owners whose first session went badly (dog ignored it, got overstimulated, or came up sore)
- People with shy or fearful dogs who need a gentler introduction
- Owners of high-drive breeds worried about overarousal on day one
- Anyone considering buying a flirt pole, wanting to know what the first week looks like
- Trainers introducing the tool to client dogs for the first time
Signs Your Dog Needs This
- Your dog tears through every walk and still won’t settle at home
- Boredom behaviors are escalating-destruction, barking, door-charging
- You tried a flirt pole once, went too hard too fast, and the dog checked out
- Your dog has high prey drive but no structured outlet for it
- The dog redirects frustration onto you, other pets, or furniture
- You want a tired dog without a 90-minute run every single day
The Pre-Session Checklist
Before session 1, check these boxes. Most introduction problems come from skipping the prep, not from bad protocol execution. Five minutes of setup saves hours of correcting bad first impressions later.
Set Up For Success
- Confirm your dog is age-appropriate. Adult dogs over 12 months can run the standard ramp. Puppies 6 to 12 months need the modified puppy version. Puppies under 6 months shouldn’t use a flirt pole.
- Choose the right surface. Grass is ideal. Dirt is fine. But concrete, asphalt, slick patio tile, or any hard surface are all wrong. The introduction is also when you teach the dog where flirt pole sessions happen, so pick the long-term location.
- Pick a fenced or enclosed space. Backyards are best. Fenced courtyards work. But open yards without containment risk the dog running off after a missed catch. The introduction is not the time to chase your dog through the neighborhood.
- Stock high-value treats. Cheese, chicken, freeze-dried liver. Something the dog doesn’t normally get. You’ll use these to reward calm investigation and post-session settling.
- Verify the equipment is set up correctly. Lure attached securely, bungee or rope intact, pole assembled fully. A flirt pole that breaks mid-introduction creates a bad first association.
- Schedule when the dog is rested, not overstimulated. Right after a long walk is wrong (already tired). Right after company leaves is wrong (already amped). Mid-morning or early afternoon on a normal day is ideal.
- Plan a calm cooldown activity. Have a chew, a snuffle mat, or a settle area ready for after the session. Transitioning from chase to calm directly is hard for some dogs. A bridge activity helps.
Vet Considerations
For dogs with diagnosed orthopedic issues, joint sensitivity, or behavioral concerns like extreme reactivity, talk to your vet before starting. Per AVMA guidance on canine exercise, new high-intensity exercise programs warrant a quick veterinary check-in if your dog has any history of musculoskeletal issues. For safety considerations specific to flirt pole work, see is a flirt pole safe for dogs.
The 5-Session Ramp, Step By Step
Run sessions 1 to 2 days apart. Don’t rush. The brain needs time between sessions to consolidate the new behavior. The body needs time to physically recover from a new high-intensity activity. Both matter.
The First Sniff
Lay the assembled flirt pole on the ground in your session location. Let the dog approach and investigate freely. No movement, no expectations, no chase. You can walk around slowly with the pole dragging behind you if that helps draw attention-keep it on the ground at a casual pace. The dog is processing one thing: “what is this, is it safe, is it interesting?”
Reward calm investigation with high-value treats. Sniffing the lure gets a treat. Pawing at it gets a treat. Looking at you with relaxed body language gets a treat. Build positive association before any work begins. If the dog ignores the pole entirely, that’s fine. End at 3 minutes regardless of engagement level.
- Dog approaches the pole voluntarily within 60 seconds
- Sniffs the lure or pole at least once
- Body language stays loose: no stiffening, no backing away
- You end at 3 minutes with a curious, not exhausted, dog
The Slow Drag
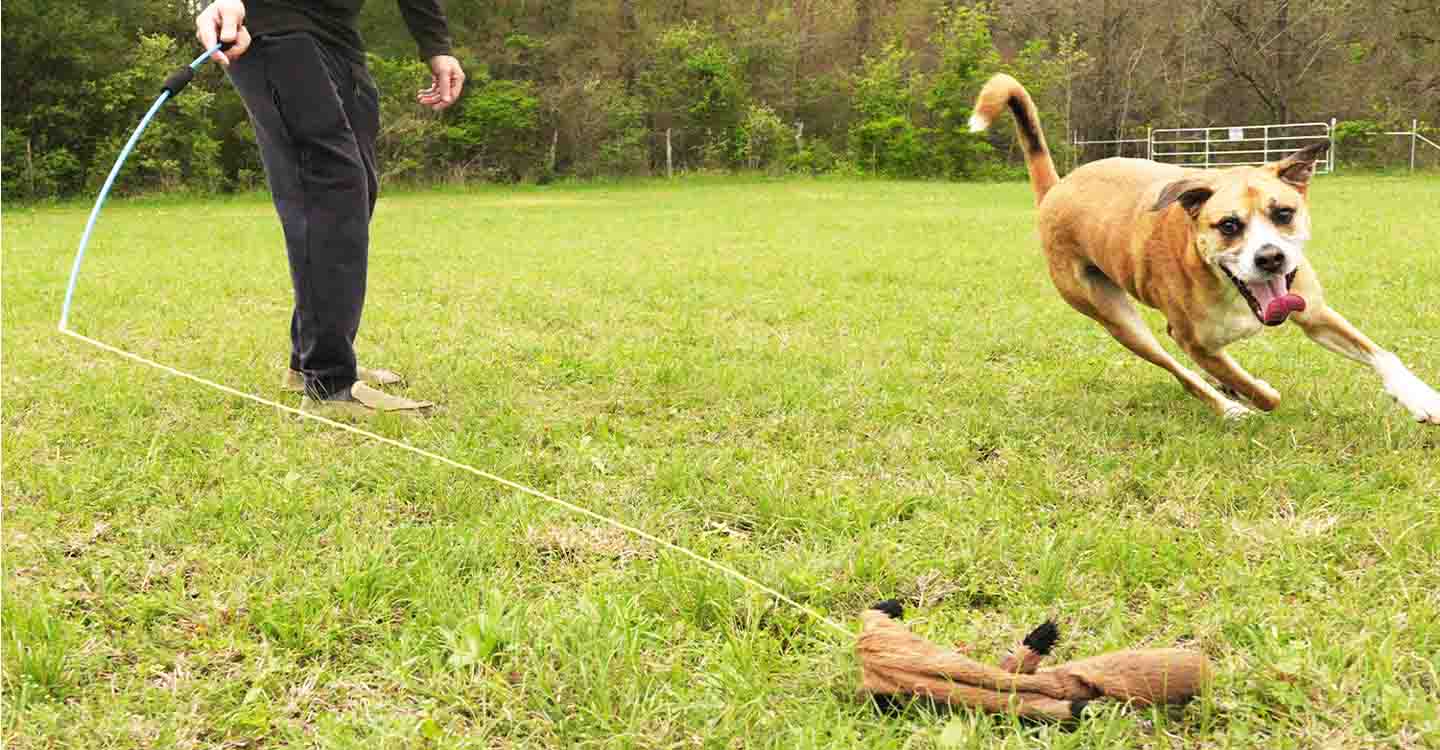
Hold the pole. Drag the lure slowly along the ground in a 6 to 8 foot straight line. Start at a normal walking pace, then ease off. The lure should move like prey sneaking away-not a frightened animal running for its life. Most dogs activate chase drive faster on slow movement than on fast movement.
Let the dog catch the lure within 5 to 10 seconds. The catch is critical. This is where the predatory motor pattern closes and the dopamine and serotonin release happens. Reward the catch with verbal praise and let the dog hold the lure for 10 to 15 seconds before starting again. Repeat 3 to 5 times across 3 to 5 minutes. End while the dog still wants more.
- Dog tracks the moving lure visually within the first 15 seconds
- Chases and catches the lure at least 3 times
- Shows obvious enjoyment: tail up, focused, engaged
- Panting normally at session end, not collapsed
Real Patterns
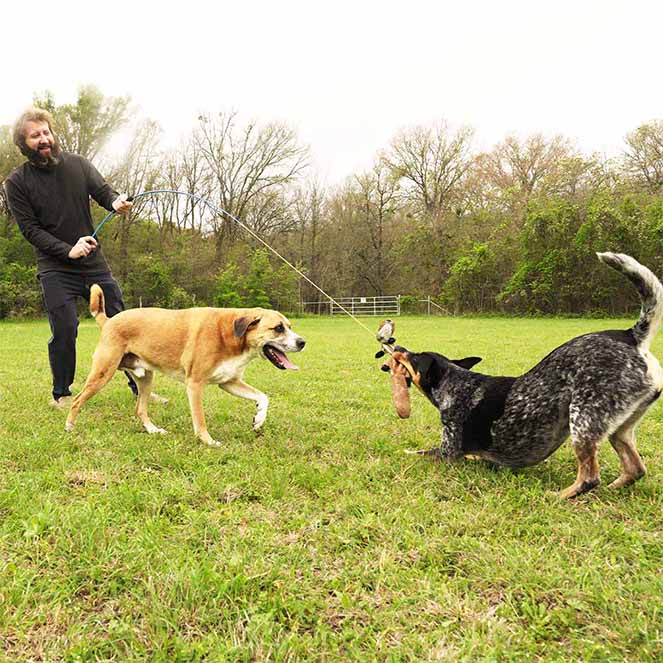
This is the first session that looks like a real flirt pole session. Now move the lure in unpredictable patterns along the ground: straight runs, gentle arcs, occasional pauses. Catches every 20 to 30 seconds. The dog is now learning what a chase looks like with you running the pole.
Watch the dog’s body language constantly. Tail up and focused engagement is success. Frantic movement, jumping, or grabbing at the pole itself (not the lure) is overarousal. If you see it, drop the intensity immediately-slower movement, more frequent catches. End every session on a successful catch, not a missed one. Frustration is what creates negative association.
- Dog engages immediately when the pole moves
- Smooth chase patterns, no frantic spinning or zigzagging
- Multiple catches across the session
- Dog is genuinely tired but content at session end
Direction Changes
Increase to 7 to 8 minutes total play time. By now, standard catch rhythm: every 30 to 45 seconds. Then introduce gentle direction changes: the lure goes left, then right, then forward. Not sharp cuts (that comes later). Instead, smooth, predictable redirects that teach the dog to track movement and adjust.
Begin practicing a release cue. When the dog catches the lure, say your chosen cue (“out” or “drop”) and offer a high-value treat in exchange. Most dogs release naturally for the treat. Restart the chase immediately-that reinforces that releasing leads to more fun, not less. It’s the foundation of the impulse control work that follows introduction.
- Dog handles direction changes smoothly
- Releases the lure on cue 50% of the time or better
- Recovers physically within 10 minutes of session end
- No signs of soreness or stiffness 24 hours later
The Full Session
This is the full standard session, run for the first time. 10 minutes. Standard catch rhythm (every 30 to 45 seconds). Full intensity. Plus direction changes, occasional speed bursts, sharper cuts. This is what a normal daily session will look like from here on.
If your dog completes this session successfully, they’re introduced. From session 6 onward, they move to the standard daily protocol. But if session 5 went badly-overarousal, soreness, refusal to engage-drop back to session 4 intensity for another 2 to 3 sessions before retrying.
- Dog engages immediately, no hesitation
- Catches the lure consistently across the full 10 minutes
- Releases on cue 80%+ of the time
- Recovers within 15 to 20 minutes post-session
- No soreness 24 hours later
The 5-session ramp is not a delay-it’s the fastest reliable path to a dog who engages immediately and stays conditioned for years of daily sessions.
This protocol takes 1 to 2 weeks. Skipping it saves you a week of “introduction” but often costs you 2 to 3 weeks of correcting a bad first impression. The dog who is introduced correctly hits standard protocol with strong positive association and zero hesitation. So it’s worth the investment.
Built for the full 5-session ramp and every session after it. Rugged XL: $74.95 (1 lure) or $94.95 (3-lure bundle), free US shipping. Standard (30 lbs and under): $55.95, shipping calculated at checkout.
Common Problems And How To Fix Them
If your introduction isn’t going smoothly, the issue is almost always one of these six. But each has a specific fix. Try the fix for 2 to 3 sessions before assuming the tool is wrong for your dog.
My dog ignores the lure completely
Fix: The lure is probably moving wrong. Drag it slowly along the ground in a straight line, like an animal sneaking away. Don’t wave it in the air or jerk it erratically. Most dogs activate chase drive on slow horizontal movement, not fast vertical movement. If slow drags still get no response after 3 sessions, try a different lure. Switch from rope to squeaky toy, or from plush to fur attachment. Some dogs have specific preferences.
My dog gets too excited and grabs at me
Fix: Overarousal. Drop the intensity by 50%. Slower movements, longer pauses, easier catches. Keep the lure on the ground, never in the air. Add structured stops where you ask for a sit before resuming. The dog needs to learn that calm precedes chase, not the other way around. The 5-session ramp is built around this exact principle.
My dog is afraid of the pole
Fix: Skip session 1 movement entirely. Instead, lay the pole flat on the ground in a familiar room and feed dinner around it for 2 to 3 days. Let the dog approach on their own timeline. Once they’re comfortable with the stationary pole indoors, move it outdoors for the standard session 1 (still no movement). Patience here pays off for every future session. Never force a fearful dog to engage with a moving lure.
My dog is sore the next day
Fix: Too much intensity, too soon. Drop one session level (if you were at session 3, run another session 2). Switch to softer grass if you weren’t already. Cut catches in half (more catches, shorter chase runs between them). The soreness usually resolves in 48 hours and the dog handles later sessions fine once they’ve conditioned.
My dog catches and won’t let go
Fix: Standard during early sessions. Use the high-value treat trade you set up in the prep. Show the treat, say your release cue, give the treat the moment the lure drops. Restart the chase immediately so the release leads to more fun, not less. Within 5 to 10 reps most dogs release reliably. For stubborn cases, work the release behavior outside flirt pole sessions first using a regular tug toy.
My dog quits halfway through
Fix: Two possibilities. Either the session is too long for their current conditioning (drop back one session level), or the catches aren’t happening often enough and they’ve gotten frustrated. Increase catch frequency by slowing the lure more and letting the dog succeed more often. Dogs who feel like they can’t win disengage. But dogs who succeed regularly stay locked in.
When Your Dog Is Officially Introduced
“Introduced” isn’t a feeling. Instead, it’s five specific signals. If you see all five at the end of session 5, your dog is ready for daily standard protocol. But if any are missing, run another session or two at session 4 intensity before progressing.
5 Markers Of A Conditioned Dog
- Immediate engagement. The dog sees the flirt pole appear and immediately orients to it. No hesitation, no questioning. They know what’s coming and they want it.
- Consistent catches. Across a 10 minute session, the dog catches the lure on most attempts. They’ve built the physical coordination and timing to track movement and intercept.
- Reliable release. When you give your release cue after a catch, the dog drops the lure 80% or more of the time. The trade-for-treats foundation has worked.
- Physical recovery within 20 minutes. Panting slows, the dog settles, breathing returns to baseline within 15 to 20 minutes of session end. Cardio conditioning is established.
- No soreness the next day. The dog wakes up the next morning moving normally. No stiffness, no limping, no reluctance to play. The body has adapted to the intensity.
Once you see all five, your dog is ready for daily standard protocol. For most adult dogs, that means 10 to 12 minute sessions starting from session 6. The buying guide in the sidebar covers sizing considerations if you ever need a backup or replacement. If your dog is a high-energy breed or you’re targeting specific behavior problems like jumping, nipping, or restlessness, those guides cover the protocol adjustments past session 5.
Graduation is five concrete signals, not a vibe. If any one is missing, hold at session 4 intensity another round or two before progressing-the dog tells you when they’re ready.
A Real Dog, Session By Session
Here is what the 5-session ramp looks like in practice. This is a composite of dozens of client introductions, representative of the pattern I see in high-drive dogs who come in with zero flirt pole exposure.
Ramp Protocol vs. Day-One Full Intensity
Most new owners skip the ramp because it looks slow. It isn’t. Compare the outcomes across the first two weeks.
| Metric | 5-Session Ramp | Straight to Full Intensity |
|---|---|---|
| Days to standard session | 8–14 days | Day 1 (usually regretted) |
| Overarousal risk | Low | High |
| Soreness in first week | Rare | Common |
| Release cue by day 14 | 80%+ reliable | Often absent entirely |
| Positive association at day 14 | Strong | Unreliable or negative |
| Engagement quality at day 30 | High and consistent | Variable, often degraded |
The ramp works because it lets the predatory motor pattern establish before the aerobic demand peaks. Per AKC guidance on dog exercise conditioning, new high-intensity activities require gradual ramp-up to avoid soft-tissue injury-especially in dogs who haven’t been conditioned for lateral cuts and sudden stops. Eight to fourteen days of structured introduction produces a dog who is physically and psychologically prepared for a decade of daily sessions.
What Will Derail the Introduction
The protocol works when you follow it. These are the specific things that break it.
- ⚠ Skipping rest days. The dog’s tendons and muscles are adapting to movement they haven’t done before. Running sessions back-to-back during introduction invites the exact soreness and overarousal this ramp is designed to prevent.
- ⚠ Letting sessions run long because “the dog wants more.” Every dog wants more at minute 8. That feeling is not permission to run 20 minutes. End on time, every time. The dog who gets cut off wanting more comes back harder the next session.
- ⚠ Never letting the dog catch the lure. This is a frustration tool disguised as enrichment. The chase sequence must complete. If the lure is always out of reach, the dopamine release never happens and you’re building arousal with no payoff.
- ⚠ Using a hard or slippery surface. Concrete and indoor tile are injury surfaces for this work. The dog is making lateral cuts at speed. One slip on a wrong surface mid-introduction can create a lasting fear response or a soft-tissue injury that sets the whole protocol back by weeks.
- ⚠ Moving too fast because the dog looks ready. Looking ready and being conditioned are different things. A high-drive dog looks ready at session 2. Their tendons are not. The ramp exists because the body conditions slower than the brain does.
Read These Next To Go Deeper
The work doesn’t stop with the 5-session ramp. These are the four reads worth doing in order once your dog has graduated.
- →The complete flirt pole training guide, the full ongoing technique from session 6 onward, including movement patterns, impulse control drills, and how the tool changes as the dog advances.
- →How often should I use a flirt pole, the standard daily protocol and session frequency once the 5-session ramp is complete. What “daily use” actually looks like week by week.
- →Do flirt poles really work, the behavioral outcome data across 400 client dogs, covering what measurably changes, what doesn’t, and what the research says about predatory motor pattern satisfaction.
- →The predatory motor pattern explained, the neuroscience behind why the catch matters as much as the chase, and what happens neurochemically when the sequence completes versus when it doesn’t.